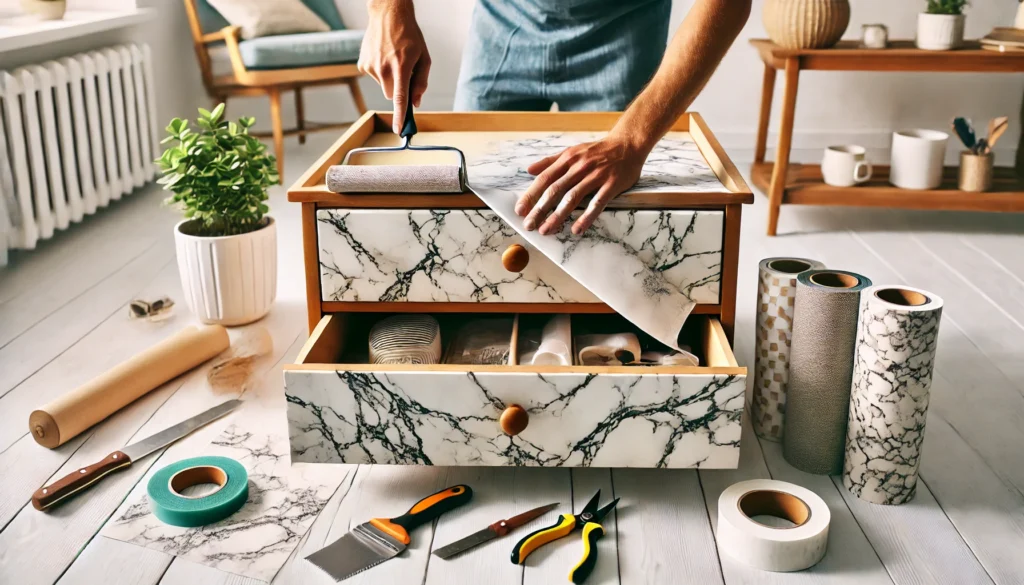
Customising furniture with contact paper or vinyl stickers is a fantastic way to upgrade your space without investing in expensive new pieces. These materials are affordable, easy to use, and available in a wide range of designs to suit any style. Whether you’re refreshing an old dresser, adding character to a coffee table, or creating an accent piece, this DIY technique can help you transform your furniture effortlessly.
This guide will walk you through the steps, materials, and creative tips to personalise your furniture with contact paper or vinyl stickers.
Why Choose Contact Paper or Vinyl Stickers?
Customising furniture with these materials offers several benefits:
- Cost-Effective: A budget-friendly way to refresh furniture compared to buying new or hiring professionals.
- Variety of Designs: From marble and wood textures to bold patterns and solid colours, the options are endless.
- Easy to Apply: No special tools or skills are needed, making it perfect for beginners.
- Temporary Yet Durable: High-quality options can last for years but are removable if you want a change.
- Eco-Friendly: Extend the life of your furniture, reducing waste and promoting sustainability.
What Furniture Can You Customise?
Contact paper and vinyl stickers can be used on many surfaces, including:
- Tables and desks
- Dressers and drawers
- Shelves and bookcases
- Cabinets and cupboards
- Headboards and bed frames
However, avoid rough, porous, or heavily textured surfaces, as these materials adhere best to smooth, clean surfaces.
Materials and Tools You’ll Need
Here’s what you’ll need to get started:
- Contact paper or vinyl stickers of your choice
- Scissors or a utility knife
- Measuring tape or ruler
- Pencil or marker
- Squeegee or credit card (for smoothing)
- Cleaning supplies (mild detergent, cloth)
- Cutting mat (optional, for precision cutting)

Step-by-Step Guide to Customising Furniture
1. Prepare Your Furniture
Proper preparation is crucial to ensure a smooth and long-lasting finish.
- Clean the Surface: Remove any dust, grease, or grime with a damp cloth and mild detergent. Allow the surface to dry completely.
- Sand Rough Areas: If the furniture has chips, scratches, or uneven surfaces, sand them down for a smooth base.
- Remove Hardware: Take off handles, knobs, or any removable parts that may get in the way during application.
2. Measure and Plan
- Use a measuring tape or ruler to determine the dimensions of the area you want to cover.
- Mark the contact paper or vinyl with a pencil for precise cutting.
- Plan your design. For instance, decide whether you’ll cover the entire surface, create a pattern, or highlight specific areas like drawer fronts or tabletops.
3. Cut the Material
- Cut the contact paper or vinyl to the required size, leaving a small margin (1-2 cm) for adjustments.
- Use scissors for basic cuts or a utility knife for detailed shapes and precise edges.
4. Apply the Contact Paper or Vinyl
This step requires patience and attention to detail to avoid bubbles and misalignment.
- Peel and Stick Gradually: Start at one corner, peeling the backing off slowly as you press the paper or vinyl onto the surface.
- Smooth As You Go: Use a squeegee or credit card to smooth out air bubbles and wrinkles. Work from the centre outward for the best results.
- Trim Excess Material: Once the material is fully applied, use a utility knife to carefully trim any overhanging edges.
5. Reattach Hardware and Finishing Touches
- Once the paper or vinyl is in place, reattach any removed hardware like drawer handles or cabinet knobs.
- Consider sealing the edges with clear tape or a small amount of glue to prevent peeling over time.
Creative Ideas for Customisation
- Marble-Look Tabletop: Use marble-patterned contact paper to give your table an upscale, sophisticated appearance.
- Two-Tone Cabinets: Apply two complementary colours of vinyl to create a modern, contrasting effect.
- Patterned Drawer Fronts: Add geometric or floral designs to drawer fronts for a playful, personalised touch.
- Themed Furniture: Use stickers featuring your favourite motifs, like botanical prints or abstract shapes, to align with your room’s theme.
Tips for a Professional Finish
- Work Slowly: Rushing can lead to misalignment or bubbles. Take your time to achieve a smooth application.
- Use Heat for Curves: For rounded edges or curves, use a hairdryer to gently warm the vinyl, making it more pliable and easier to mould.
- Test First: If you’re unsure how the material will adhere, test a small piece on an inconspicuous area before committing to the entire project.
Maintenance and Longevity
To keep your customised furniture looking great:
- Clean Regularly: Wipe surfaces with a damp cloth. Avoid harsh chemicals that may damage the adhesive or material.
- Avoid Sharp Objects: Prevent scratches by keeping sharp items away from the customised areas.
- Reapply as Needed: If edges start to peel, use a small amount of glue or tape to secure them back in place.
Why This DIY Project is Worth Trying
Customising furniture with contact paper or vinyl stickers allows you to create one-of-a-kind pieces that reflect your style and personality. It’s a budget-friendly and creative way to transform your home décor, whether you’re renting, experimenting with designs, or simply refreshing your space. Best of all, it’s a low-risk project—if you don’t love the result, you can remove it and try something new!

